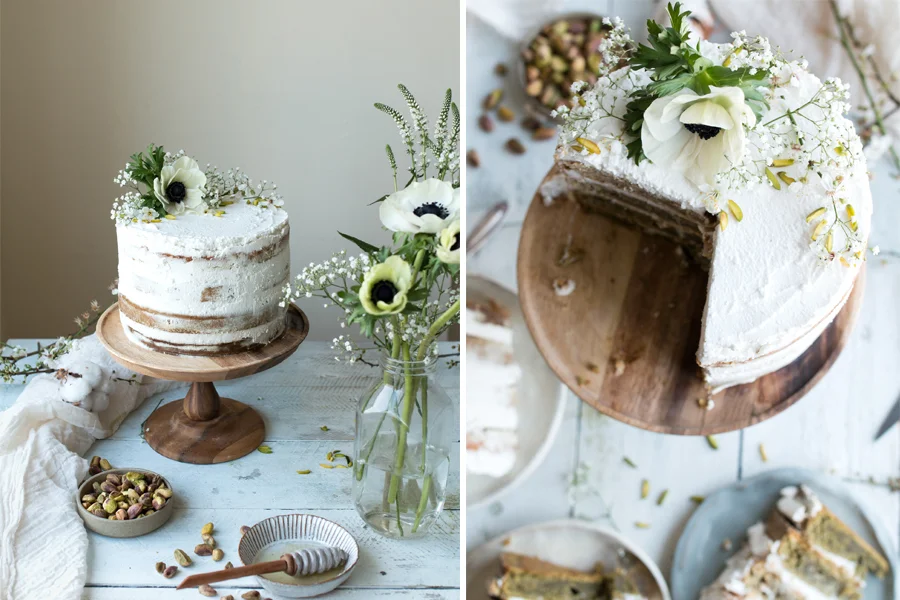
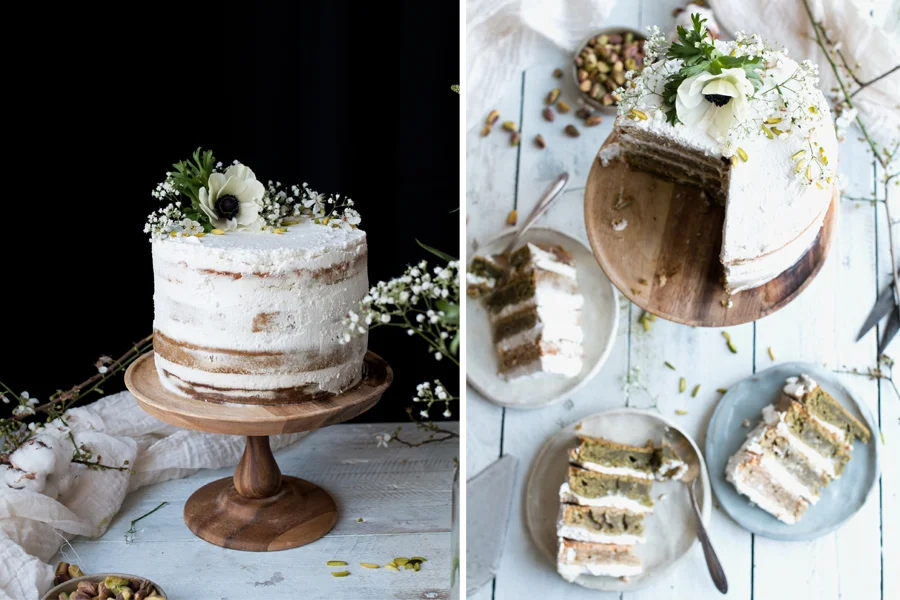
VEGAN MATCHA PISTACHIO TRES LECHES CAKE WITH TWIGG STUDIOS AND SALVIA+LIMONE (V+, V, ChF, GF, R)
Today it's all about collaborating with the brilliant forces behind Twigg Studios and Salvia + Limone, but if you just want the recipe for this beautiful vegan Matcha Pistachio Tres Leches Cake, please don't be shy and make your way to the end of this blog post where you'll find it.
I am never sure how I come across on social media. If the person you envisage me to be, is anything like the person I really am. If you hear my voice in your mind the way it actually sounds (deep-ish, subtle American accent, that's gone a bit British – think Madonna in her Guy Richie days) or if you're totally off the mark ;). So in case it's not blatantly obvious – and just for your info - I am a social creature. Now, don't get me wrong, I LOVE my own company and have no problems being alone, but I thrive mostly in social situations. Hence going from a busy office full of chatty, like-minded social workers to a quiet studio (AKA the guest bedroom) where I work in solitude has been an interesting change. I am extremely happy I followed my heart and moved into blogging/food photography/recipe development (you can read more about that change here), but that's not to say being on my own during the day hasn't required some getting used to.
Consequently, I relish any given opportunity to replace my hours of solitude with moments of chatter and laughter surrounded by talented, creative and lovely women. Women who are eager and open to share their special gift and unique talent with me (I feel so lucky!). Women whose generosity made today's blog post possible.
Now, I must confess on paper and perhaps to the uncanny eye, Aimee from Twigg Studios and I are the most unlikely pairing EVER! We are most certainly on opposite ends of the spectrum when it comes to blogging – Aimee is the voice behind the STUNNING Twigg Studios, a baking blog dedicated to all things decadent. And I essentially write a vegetarian health food blog. Yet, our common ground – a desire to be the best that we can be and to create beautiful, delicious content – is what allowed our online connection to turn into a proper blogger friendship.
Aimee and I met for the first time in 'real life' back in late 2015 and with her plans to return to London in early 2016 for meetings related to her book launch, the idea of a joint blog post soon developed.
As for my connection with Silvia, macrobiotic chef, mother of two little people and the blogger behind the gorgeous Salvia + Limone, well, that's a different story all together. But suffice to say, I kinda sorta stalked her at the Food Blogger Connection Conference back in the summer of 2015, having discovered her blog just days before then. Though it must be said we didn't discuss a collaboration at that point at all; in fact our encounter was rather brief. Nonetheless, over time I have become more and more inspired by her work, so much so that I had to use her words as an opening to this blog post because they captured my sentiments so perfectly. Thereafter another meeting became almost inevitable and, killing two birds with one stone, I ended up inviting both Silvia and Aimee to my 'studio' on the same day. A stroke of genius, if I may say so myself :) ;)
So what you see here, is what happens when 3 women get together, not to compare and contrast, outshine or undermine one another, but to work as one, respecting each other's different perspective, expertise and ideas. I cannot stress strongly enough how utterly empowering this experience was - exhausting and exhilarating in equal measures - but so, so wonderful nonetheless. And though, as I write these words late on Sunday evening, our day together has long since come and gone, I still feel slightly elated, especially considering that there was TONS of planning that went into this blog post all of which took place well before we even got together. Frantic DMs on instagram, secret pin boards on pinterest and a couple of e-mails back and forth too. I even have a little blister on my index finger from all the DMs I wrote on instagram, getting over excited as the cake started to take shape in our minds. :) And then to see that these images here are the result of all our hard work - so satisfying :).
Now, I can't urge you strongly enough to visit Aimee's blog to see her capture of the day here AND to visit Silvia's blog for her perspective here. I promise you, you won't regret it.
Thanks for reading everyone and I hope you enjoy the recipe :)
P.S. If you'd like to see some of my past collaborations, please just click here.
P.P.S. Aimee and I are teaching a food photography workshop together. If you'd like more information, please check out my food photography workshop page or follow Aimee and me on instagram or Aimee and me on pinterest to stay up to date on developments ;).
VEGAN MATCHA PISTACHIO TRES LECHES CAKE WITH TWIGG STUDIOS AND SALVIA+LIMONE (V+, V, ChF, GF, R)
So before we get stuck into this recipe, a few 'confessions' are in order.
1. Strictly speaking this is not a vegan cake as we used honey. Raw, local and super flavoursome honey, but honey nonetheless. However, it is so easily replaced with maple syrup, it felt almost petty to classify this cake as plant-based rather than vegan (though I have added the tag 'vegetarian' to this recipe, just for correctness).
2. On the day lots of things went right - the flavour combination, the home-made vegan condensed pistachio milk, the raw dairy-free frosting and the styling BUT the sponge didn't quite work out as planned. Somehow the mixture was just too dense and didn't rise properly. It's just one of those things. So the cake recipe below is tried and tested, though not the one we actually followed on the day.
IMPORTANT: Please check the notes at the end of the recipe before you get stuck into baking ;), especially as you'll need to do some bits and pieces the night before you get baking!
Pre-preparation Time: soaking the pistachio nuts overnight
Preparation Time: 30 - 35 minutes
Baking Time: 25 minutes
Icing Time: 10 minutes
Makes: a 4-layered ombre cake using 4 16-cm wide cake spring froms, serves about 12
Cake ingredients:
some coconut oil for greasing the spring forms
150g coconut oil, melted
200g plain white flour + 50g spelt flour
320g fine coconut sugar (if using regular sugar, please use less, to taste)
1 + 1/4 tsp bicarbonate of soda
1 + 1/4 tsp baking powder
a good pinch of salt
190ml of home-made pistachio milk (see below) + about 6 extra tablespoons (see instructions)
3 tbs ground flax seeds + 9 tbs water
1/2 tsp of vanilla extract
6 tsp of matcha powder
Home-made pistachio milk ingredients:
1 cup of pistachio nuts, soaked overnight
3 cups of water
1 date, pit removed
Home-made condensed milk ingredients:
2/3 cup of pistachio milk, (or 1/3 pistachio and 1/3 almond milk)
1/3 cup of honey (or liquid sweetener of your choice)
Should yield about 1 ltr, enough for this recipe, but do have some additional almond milk in stand-by
Raw frosting ingredients:
900g coconut yoghurt (we used this one)
2 tbs honey (or other liquid sweetener of your choice)
Cake Decoration:
Flowers and pistachio nuts (optional)
Instructions:
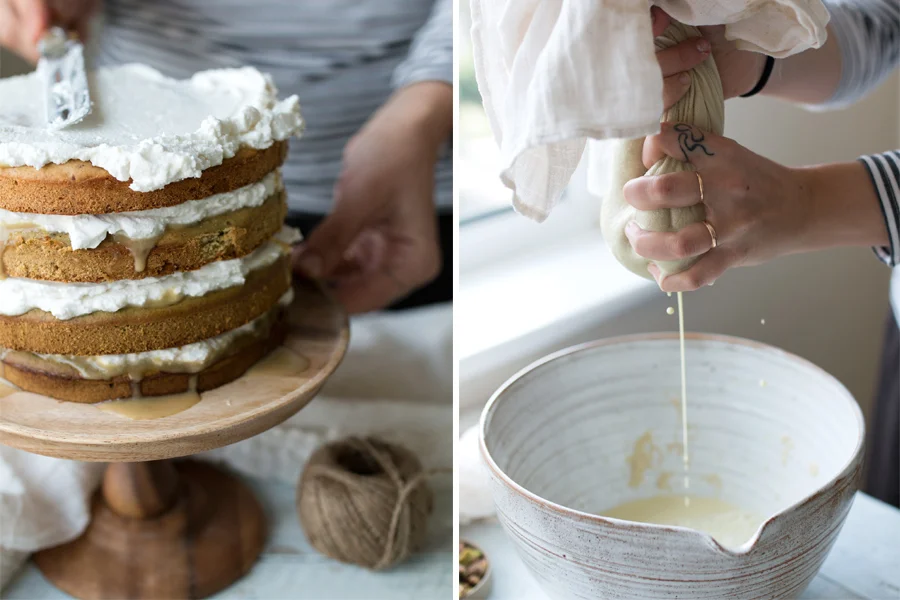
The night before baking this cake, please soak the pistachio nuts in filtered water. They need to be just covered in water. The next day, strain the nuts and give them a good wash. Place them in a high speed blender, together with the date and water and blitz. Then strain the milk though a cheese cloth or towel. Save the pulp in a container in your freezer for future baking and set the pulp free pistachio milk aside.
Grease the edged of 4 16-cm cake spring forms, ideally with bottoms that are removable. Preheat the oven to 170C/335F
Next combine the ground flax seed with the water and set aside.
In a large bowl mix together all the dry ingredients (flours, baking powder, salt, bicarbinate of soda and sugar though NOT the matcha powder.
In a separate bowl mix together the melted coconut oil, vanilla, 190ml of pistachio milk and ground flax seed mixture.
Next mix the dry ingredients into the wet ingredients and briefly combine. Then split the batter into 4 parts, each placed in its own bowl. The first mixture can go into the prepared cake form as is.
Please add 1 teaspoon of matcha and 1 tablespoon of pistachio milk to the second part of the dough. Combine, then place in the second prepared cake tin.
Then add 2 tsp of matcha powder and 2 tbs of milk to the third part of the dough. Combine and pour into the third cake tin.
Lastly add 3 tsp of matcha powder and 3 tbs of milk to the fourth and last part of the cake dough. Combine and pour into the final cake tin.
Place all 4 tins into your oven and bake for 25 minutes or until ready.
Whilst the cake is baking, prepared the condensed milk by combining the ingredients in a pot and gently allowing it to simmer over a low heat, stirring until it reduces to the desired consistency. We stirred for about 10 minutes.
Next prepare the frosting by just combining the two ingredients.
When the cake layers are ready, remove from the oven and let cool.
Then poke little holes into the cake layers with a fork.
Pour the condensed milk over the cake layers and allow it to be absorbed. The cake layers should be moist but not wet (we had quite a bit of condensed milk left over actually).
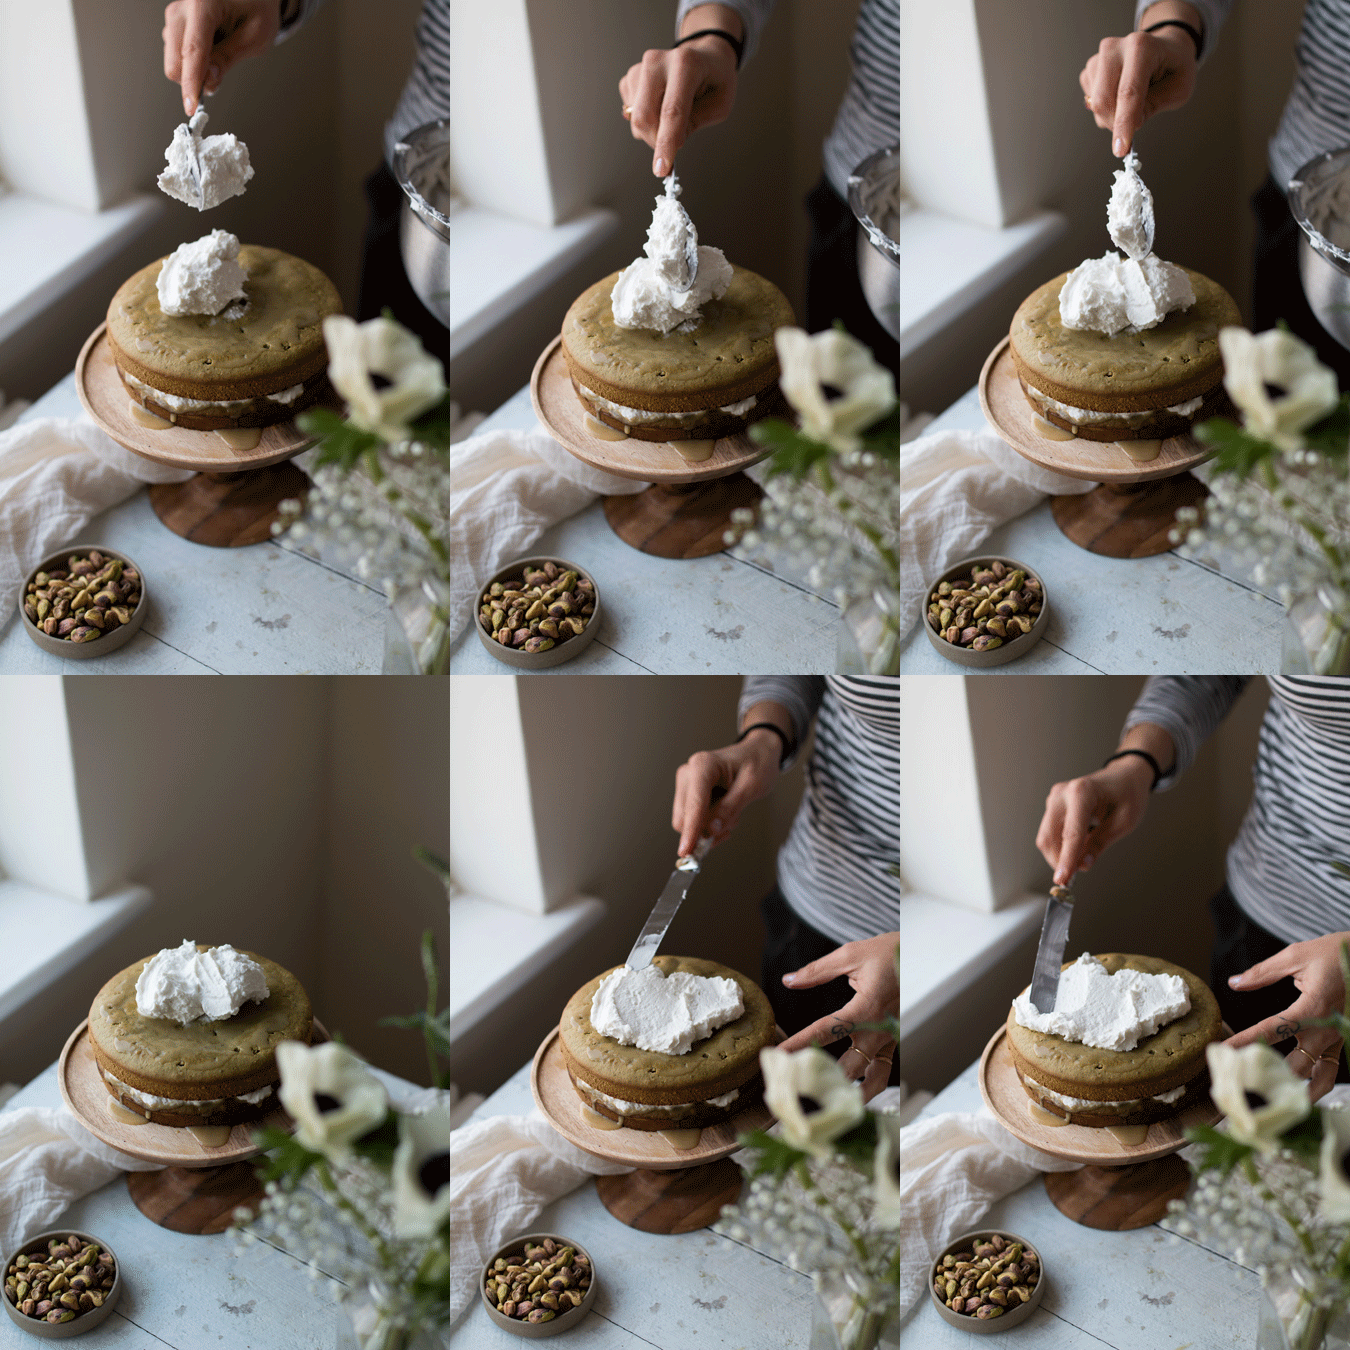
Then start icing, decorate with flowers and enjoy!
Tip 1: We wanted to create our own milk, but you can of course use store bough plant-based milk, such as readily available almond milk. Also, if the milk you make does not yield enough for this recipe, you can use some additional almond milk if required.
Tip 2: You can use all white flour if you wish and plain sugar if you prefer.
Tip 3: Instead of the water and flax seed mixture you can also use 3 eggs.
Tip 4: We wanted to create an ombre effect which is why we created 4 different layers and used the different quantities of matcha powder. But you can of course play around with this, creating 3 layers instead of 4, or just have each layer be the same colour for sake of ease. Just remember that for every teaspoon of matcha powder you use, you need to add 1 tablespoon of plant-based milk as the powder absorbs some moisture.
Tip 5: The coconut yoghurt we used was quite stiff and much less runny than cow's yoghurt. But beware the consistency of the coconut yoghurt may depend on which brand you use. We used quite a thick honey so please note that using thinner maple syrup may change things a bit too.
Tip 6: If you find the mixture is too wet, please add 50g of flour and add another 1/4tsp of baking powder.
Finally, please don't be put off by these long notes. The cake is lots of fun to make and a great project to undertake together with other women in your network. So get baking ;)


